

I looked at my copy of Pilgrim's Progress the other day... and realized it's a retelling and not the original. Drat. I suppose that I could buy a new one, but the book budget is currently used up, so I decided to make my own homemade copy. Since I'm doing one, I may as well do another, so I am also doing a copy of the poems my older son ought to be doing, but isn't because the whole etext thing isn't working for me right now. I greatly prefer a real book in my hand!
First, I went and grabbed the Project Guttenberg PlainText UTF-8 version of the text of Pilgrim's Progress that Ambleside Online links to, copied and pasted it into Open Office. I'm also making a copy of the recommended poems for Ambleside Online Year 5, which are not public domain, but are made available to the public free of charge because the women of AO are amazing and generous. Both of these texts copy and paste nicely to my word processor, so I don't have to go through and delete weird characters or anything like that. Next, I picked out a cool special character (Open Office has special characters on the Insert menu), bolded it, and used the word count tool to help me break it up The Pilgrim's Progress into readings, putting my special character about every 800 words, which is the length of reading the AO recommends for this book; the poems we'll just do one in a sitting so they don't need that kind of thing.
I also added a pretty title page with fancy font, and made sure that all my text was at least 12pt font: too much smaller and you'll have a small print edition of your text, as it's going to shrink when it's printed. If you like your text a little on the larger side, you might go 14. I typically print at about 10, so I'm happy with a smallish font. You can add in illustrations if you want, but I didn't; this version that I'm doing this time is a very functional book, but it's not really elegant. It is, however, cheap and tough: the ones that I did for Our Island Story and Secrets of the Woods have held up beautifully as I've read to my son over the past year and a bit.

Printing
Then it was time to print, which I think is the trickiest part of this project: you need to booklet print, with text on both sides of the page. In the print menu, select booklet printing. Last time I used Word, it was a similar process.

My printer will only print things one side at a time, and the first side is easy. Pilgrim's Progress is too long to do all in one big go; you want it to be done in several little booklets; I find that 6-10 pages is a nice size. This time I did 10, but if I'd done my math properly I would have done some fewer, as that left me with a very small 3 page booklet at the back. But it's not a big deal if they're not all the same; don't let your inner perfectionist freak out over it.
To print 10 pages of booklet, you'll tell your printer that you're working with pages 1-40, because each paper will contain 4 pages of text: 2 on the front, and 2 on the back. Keep your booklets between 6 and 10 pages by multiplying the number of papers you want by 4 to keep from having blank pages in the middle of your book.

I always go back to the first screen and choose the side of the paper that I'm printing as a separate step. It helps me to keep track of things that way. First, you print the back/left sides.

Next, you have to put the paper in your printer correctly. This varies from printer to printer, and it's the biggest headache of the whole process. In my case, you flip the pages over (top becomes bottom) and rotate it 180 degrees (front becomes back). But my old printer was different, so you'll have to play with yours. You can print a test booklet that's 8 pages to figure it out without wasting too much ink and paper, and then print the real thing that's the actual number of pages you want.
Print the first side, then put your paper in correctly, and print the front/right sides.

Next, you repeat that process, adjusting the page numbers your printing from the document (for example, 1-40, then 41-80 and so on) until you have several little booklets. As each one comes out of the printer, straighten and fold it. I usually also number the lower right corner, numbering the booklet's place in the stack: 1, 2, 3...

Making Booklets
For each booklet, do the following:
Open it up, and place it on the sewing machine so that the needle lines up with the fold. I find that it's a little easier to see the crease if the valley fold faces up: the inside of the booklet. I don't get a special needle for this, just my regular general-purpose needle. And while it's a good idea to change your needle more often than I do, and I would definitely get a fresh one if I was doing something fancy after this, I don't find that it really blunts my needle tons, either. That being said, I'm more wanna-be than a real seamstress: your mileage may vary. It's possible that I don't actually know what I'm looking for. But I don't use a special needle. And I just use whatever color of all-purpose thread is already on the needle.

Sew all the way down the center line between the pages. You can remove each booklet, or you can just slide the next one in as the first finishes, kind of like you would do for quilting, and then carefully cut them apart; there's always a little gap in there no matter how close I have them when I feed them through.

When you are finished, your booklets will look like this, with a line of stitching down the spines holding them together.

You can do a number of things with the booklets as little standalone books with cardstock covers: just fold a page of cardstock and make it your outside layer when you sew your booklet. We've made letter books and folk song books and DIY phonics readers and a number of other things from them. If you're doing something small, this may be as far as you need to go. But the books I'm working on were too large to fit into a single booklet, so in this case I'm leaving the cardstock cover off in favor of a file folder cover in a few more steps, and just want sew up the spines on the stack of paper booklets.
Making the Textblock
That done for each booklet, it's time to join them into a textblock.
For this, I like to start by clipping my booklets together with binder clips. You can do this with three or even just two binder clips, but I think four is easiest: one for the top and bottom, and two on the sides.

I keep the edge of the clip close to the edge of the paper because that way it holds things more firmly, and I like the booklets to be compact.

With my hot glue gun, I glue the open section. Because I like it held snuggly, this process takes a little longer than it otherwise might: I glue, wait for it to dry a little bit so it can't sag open as I remove the clips, then glue some more. This means that I glue about an inch, wait, slide the top binder clip down the spine, and glue another inch or two. Make sure you go all the way to the top and bottom edges, and coat the middle thoroughly.

If you're careful, you can get the glue to lay more or less flat, and I like to cover all of the whole spine completely, which makes a sturdy book. If the glue doesn't lay nicely flat, don't stress over it: it's going to be covered in another layer of glue and then a file folder cover on top of that, so it doesn't need to be perfect. It took me several books to get good at making the glue lay decently.

As I get a little further into the gluing, I remove the binder clips, until only the one at the bottom is left, and I take the glue all the way to the very bottom of the spine.

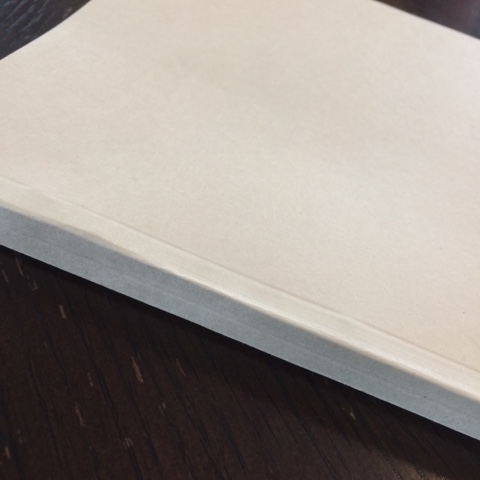
When the glue is dry, it will look like this:

Making the Cover
For each book you are making, you'll need one file folder.

Line up the spine of your textblock with the fold edge of the file folder and mark the top and bottom of your book. Leave just a little space above and just below your text block: covers usually overhang the pages by just a little bit, and I like to leave enough space that I can cut my mark clear off without leaving it too small. So give yourself just a little bit of room as you do this.

Cut it down to size. It should be just a couple of millimeters larger than your text block, so that it overhangs just a little, but not so much that the edges will crumple in use. I use my scrapbooking paper cutter to get the nice straight lines.

Test fit your text block into the folder. One side of your spine is going to be the existing fold the folder already had; one of them you will have to make. Usually one of the premade folds will work for making the spine of the book. Make the second fold and crease it nicely while the textblock is out of your cover, then check to make sure that it fits well.

Mark the width of the book. Lay your textblock in the cover touching the spine, and mark where it hits the back side. You're going to have a little extra bulk from the hot glue, so once again, leave yourself a little wiggle room, probably a little more than last time.

Put it back on the trimmer and cut it down to the final size.

Test fit again to make sure that it's right. I like to put the stuff that's printed on the folders on the back cover, so I always plan to set it up like this:

Once you are satisfied that they fit nicely, get out your glue gun again and get it nice and hot. You'll want to work quickly for this step, because this time you need to get the whole spine glued before the first glue you lay down dries, and having the glue gun sit long enough to get thoroughly hot helps that. Run a couple of lines down the spine, being sure to go clear to the top and bottom, then set it into your cover and press it down. You'll have a few seconds where you can kind of shape the spine to keep it more square and book-looking. Press down and shape it until you're satisfied that the glue has dried.

Open up the book and quickly run a single line of glue down the inside of the cover, again paying special attention to the very top and very bottom. Close it partway and shape it again. I don't like to close it all the way during this step; I feel like that makes the book hard to open. But I do press it along the spine itself to make sure it adheres well.

This is what the spine looks like when it's all finished.

At this point, the book looks like this, and all that's left is to put the title on the front and the spine. You can do that with just a sharpie if you'd like. I'd planned to do it with my new calligraphy pen... but I accidentally put my title on the wrong book. It's a good idea to double and triple check to make sure that you're titling the book you think you're working with if you build more than one at a time.
Because I messed up, I went ahead and printed the titles out again. Take care that you don't make them too big. Test fit your lettering as you go along. Because I was covering up an error, I needed a second colored paper for a mat; happily, that also looks nice.

When I got it all straightened out and on the correct books, this is what they looked like:

The very last thing that I did was to take a fine line marker and write the name of the books on the spine.


After talking to some of the ladies on the Ambleside Facebook group, I have my eye on doing one of these lovely books. Looks like there's a lot that's similar -- but also a lot more effort goes into it, and I'm excited to try it out. I'm probably going to be doing something like that for my next nature journal, since the one I have is nearly finished and filled up, and I want something that takes watercolors a little easier next time, but doesn't cost an arm and a leg. Also, it sounds like fun.
But for this time, I'm really happy with how my little books turned out. Even if I learn how to do nicer ones, for times when I just want something that works, and don't have the time and energy to do something that's super fancy, I'll probably still use this method.

1 comment:
Very cool!
Post a Comment