09 10

29 July 2017

Odd Bits: Planning, Latin, and Burdens


::1::

We started doing Latin a while back, and I started wondering: once we've learned some stuff, what is there that we can read? I'm sure that I'll find some other, more traditional things, but there's this fun list of classic children's books that have been translated into Latin. Some of them are even picture books, which should make a good starting place for building a collection of Latin works. I think that, when you are serious about learning a language, collecting materials in that language should be a priority: literacy follows books, not the other way around, so I don't like to wait until we are already good at it before we start finding materials that are enjoyable to look at.


::2::

I love this story about the guy that got the Constitution amended -- who pushed and pushed until one of the Amendments that James Madison authored, one considered for inclusion in the Bill of Rights, but never actually ratified, was passed in 1992. Just as good is the way that the process affected the teacher that gave the poor grade that started it all.


::3::

It's time to make some lesson plans, if I can ever get my life to settle down and figure out how to get some uninterrupted time at my desk! This season isn't very good for that kind of thing. So here's a couple of homeschool links:

::4::


26 July 2017

William the Conqueror Crown Craft Tutorial / RigidWrap & CelluClay Review {Crew Review}


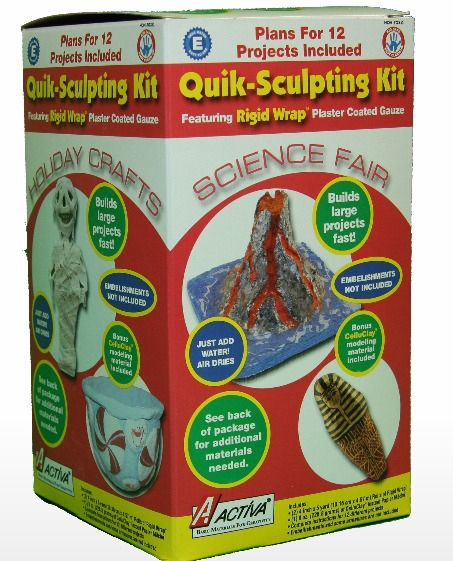
Rigid Wrap and CelluClay Quik-Sculpting KitFor this review, we were given the Rigid Wrap and CelluClay Quik-Sculpting Kit, which is made by ACTÍVA Products. There is also a ACTÍVA Products' Favorite Sculpture KIDS CRAFTS, which is a free ebook designed to go with the kit, downloaded from their website.

This is a first for us; we've never used Rigid Wrap or anything like it. It turns out that there's a lot of tutorials on YouTube and Pinterest, if you search for things like "Rigid Wrap" and "plaster cloth", which was really helpful to me. There are also instructions in the ebook, but it was in seeing other people actually using the materials that I started to understand what the materials are like and get an idea of how to use them. The ebook includes a number of craft projects, but I wanted to make something that would line up more with the history that we've been doing, which is focused on the time period around William the Conqueror right now. I decided that we would make a replica of the crown he wears in one of the portraits that I found of him.

Image Credit
William the Conqueror is of particular interest to me because one of our ancestors, Ralph deScoville, came over from Normandy with the Duke, and that branch of the family ended the conflict over the English throne as a member of the Norman nobility that owed their lands to the new king, receiving them in thanks for his part in helping William to the throne. Because of this connection, I wanted this period of history to stand out in their memories, and spending a little extra time on doing a  craft, I am hoping, will help with that. So I found this picture, which I think is a historical painting, but I've had trouble sourcing for certain, and we're attempting to make a model of his crown. Rigid Wrap comes in a roll; to use it you just cut strips off it. We started with longer ones, about 4 inches long, and later used shorter ones to fill in specific areas. To activate it, you just get it wet, then squeegy the extra water out, though the kids most often just took it straight from the bowl to the project, without pausing to wipe away extra water, and it didn't hurt things at all; the kids were all really excited about this project and there was a lot of enthusiasm. We started with the round "bowl" shape part of the crown, built on one of my cereal bowls (covered in plastic wrap so it would come out at the end) as a mold.

The kit is really generous, so after we'd started the crown, we tried making a rock, like what the people who do model railroads and war games with miniatures make, while we waited for the crown to dry. The enthusiasm for this rather gooey activity was in no way spent, so we went ahead and got started the second project right away. We don't do a lot of playing tabletop war games, but the Daddy and I have enjoyed painting minis for years, and some of the scenery pieces that people were making in the tutorials I found for these materials are really cool, so I wanted to try making a rock. The base starts out with just paper and things that we found in the recycle bin, which looks amazingly credible as a rock shape already after we'd covered it with strips of Rigid Wrap. We set both of them outside to dry, hoping that the wind would hurry things along for us, because nobody really wanted to wait long for the next phase of the activity! The cool thing is, even with two projects in progress, we haven't even used up a whole roll of the plaster cloth.


At this point, I turned my attention to the CelluClay that's included in the kit. Unfortunately, the instructions in the kit don't have anything to say about this, which, although the box says it's a bonus, is half of the contents of the kit. This is frustrating: if you're going to include a "bonus" product (which is no doubt worked into the price), then there should be instructions on how to use it. After a little digging in the links they gave us for the review, I found a winged hearts project on the website that includes instructions for how to use the CelluClay. If I had bought this at the store, this would have been more than a little irritating to need to go searching for instructions: the included projects just say "mix CelluClay in a ziplock baggie", which isn't very helpful. And it really needs instructions: you mix the stuff you get in the box with water and mold it into the shape you want. This is totally different from any other clay we've tried previously. However, it's really easy, just a 2:1 clay powder to water mixture mixed up with your fingers, and it's pretty easy to manipulate the wetness a little, depending on what you're trying to do: more water will smooth out really pretty nicely (though not perfectly smooth), and less water holds its shape a little more firmly. The winged hearts project even has a video that you can click through to, so you can see what it's supposed to look like, which was really nice.

We coated both the crown and the rock with CelluClay, trying to smooth out the crown as much as possible, and using it to create texture on our rock, as well as fill in some of the gaps we still had between sections, and smoothing away the grid-texture from the Rigid Wrap, which didn't fit the rock idea at all. The kids had a great time with this part. Peanut and Dragon handled the crown and Hero did the rock. I mostly just kept the younger kids from getting the clay too thin with the water we were dipping our fingers in to do the smoothing.


In addition, I found that you can also play around with it as it dries, and continue to nudge it into the shape you want as it starts to harden, which is a great feature. I did that with our rock, smoothing out some of the spikes the kids had left, after it was drying and no longer the center of their attention. After we put the CelluClay on, we needed to let it sit probably close to 12 hours before it was completely dry. This project was one that we worked on several times over a couple of days. It doesn't take long at all to put things together at any of the stages in building it, but there's a lot of drying time in between, so  plan to do this with several days to work and wait and work again.

For the crown's little decorative ridge, I used another layer of CelluClay, and for the spikes that come out of the ridge, I built six little triangles with circles on top that on a piece of cardstock, just drawn out freehand, then tucked into the wet CelluClay.

I think that, if I was doing it again, I'd use very thin cardboard, and coat them with one or the other of the materials, which would toughen them up and give them a texture similar to the rest of the crown, but this time I just went with putting the cardstock spikes on the crown, set into the CelluClay. This idea didn't end up working very well, as they didn't stick to the crown the way that I'd hoped. But it's good enough to be fun to play with once it's finished.

Then it was more drying overnight. But I did spray paint the rock project black as the first step in getting the white lump to start looking more like a rock! We left the crown white as the base color, since you tend to get brighter colors that way, and Hero wanted to paint it red. I evened up the bottom with the scissors before I turned it over to them. A tougher tool would probably have been better, but I didn't have anything that seemed likely ready to hand, and the scissors did get the job done.  I did point out that crowns are typically made of gold, but Hero said he was going to start with red. He and Peanut painted it, and I went behind and filled in some of the white spots for them: the texture meant that Peanut, especially, had a hard time getting into all the dips and valleys with the paint. Which is just fine for the crown, and absolutely perfect for the rock.


Pretty soon, our own royalty were sporting crowns. We got out some of the dress-ups and costumes (Do you like the LOTR tunic that I made Hero a while back?), and messed around for a while.


The crown itself is surprisingly sturdy, and will probably last a while even in dress-up play, which is pretty cool. We didn't put too many layers on, probably 2-3 in most places, though the top has a little more where I was trying to smooth away the print from the foot of the cereal bowl we used to make it, and I had been a little worried it would be flimsy, but it's not at all. It's a little on the small side, so if you do this probably pick a bowl that fits the kids' heads a little better than ours did; I didn't think to size it before we started. 


The rock turned out beautiful. It even fooled Dragon into thinking that I had a real rock at one point -- and he helped make it, silly kid! I finished painting it, and then glued some of the flocking we have to do bases of our minis to make it look mossy and dirty... like a rock should. I'm really pleased with how it turned out. The projects in the ebook are cute, but they're really very young, and one of the things I wanted to know as if the Rigid Wrap and CelluClay could be used for projects that teens or grownups might want to do -- can they be real art, as well as crafts. And the answer is a resounding yes. I saw another Crew member talking about doing a relief map for part of their geography work, which is a great idea, especially if you're going to be working on a certain area over a period of time. I think it could absolutely be used for that and for all kinds of other projects, ranging from the youngest kids' crafts to serious art projects. I love the versatility of this product.


At the end of these fun projects my thought is that the products are very good, and there's a whole lot of different things you can make with them -- once you figure out how to use them. The instructions are lacking for both how to use them, and how to clean up: I ended up with plaster stuck to the bottom of my bowl when I didn't wash it out right away. Probably should have seen that coming... but I didn't, and a little note in the instructions would have been really nice. However, both Rigid Wrap and CelluClay are easy to use and the kit is generous enough to do a number of projects, so once you have learned what to do, the possibilities for what to build are near endless. Clean up is easy -- but don't dump it down the sink! I was looking at one of the other reviews, and plaster in the pipes caused some minor problems for one of the other Homeschool Review Crew families. But the lack of instructions are really the only downside. Clean up, as long as you do it immediately, is a snap: everything just wipes away, and any plastery water gets dumped in the yard. The cardstock pages we used to protect our surfaces were completely adequate to the job. You could use tinfoil or maybe parchment or wax paper if you didn't want it to stick to your base, but we just ripped the cardstock off and it was no big deal for what we made. Both the Rigid Wrap and CelluClay are easy to use, and I can definitely see us using these supplies again at some point. Plus, even after doing these two projects, there is about half the contents of the box left: I love it when good supplies stretch for several projects.


If you want to read more reviews of the Activa Products or look at all the clever projects other Crew members made, please click the banner below.

http://schoolhousereviewcrew.com/adventures-of-rush-revere-book-series-reviews/


Crew Disclaimer

25 July 2017

R.E.A.D. Curriculum and Review Pack {Crew Review}

READ Curriculum Notebook

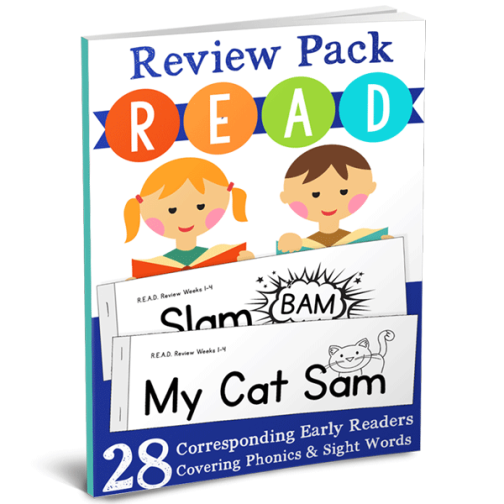
For this review, we were given the Learn to R.E.A.D. Curriculum Notebook, a 36-week phonics curriculum with some language arts components, and the R.E.A.D. Review Pack, which is 28 early readers that correspond with the R.E.A.D. Notebook, both from the The Crafty Classroom. The readers can be used with the R.E.A.D. Notebook, or on their own. Both of these are kindergarten products. The R.E.A.D. Notebook says that, "If your child is able to identify a majority of the letter sounds they are ready to begin this curriculum."

My first impression, downloading these projects, is that the files are huge. The R.E.A.D. Notebook is 798 pages, and the R.E.A.D. Review Pack is almost 100. In looking them over on the The Crafty Classroom website, I hadn't realized they were so large. That is a lot of printing, and my printer wasn't working very well at the start of the review, so be aware that a number of my pictures don't reflect the actual print quality very well. It's also a black and white only, but a number of the pages in the R.E.A.D. Notebook are very cute color pages. For most of the pages, it's not a big deal that there are light places, and color pages are printing fine greyscale. We figured out the problem with the printer, so when I printed the readers, things were much better. However, buyers should be aware that these products are going to give your printer a workout! I found a notebook and started out with the first 39 pages, which gave me the instructions for using the curriculum, pretest materials, and the first word family's activities.

The first thing that you do with your child is check and make sure that they know their letter sounds. I was a little surprised at how much work Peanut still needed on this, and we spent the first week or two just working on letter sounds, and introducing the daily page. There are several pages included in the packet for testing letter sounds, and these have turned out to be extremely useful for finishing teaching the letters. I put these letter pages in sleeves -the curriculum suggests doing that with a few things; I did it with a lot- and we started out shoring up letter sounds. We also practiced some of the daily things, her name, some of the counting exercises, and so on. We started with the page of letters with pictures (which should be color, but prints decently anyway, even with my printer doing parts of the page extra light; also the capitals on the left are uneven because of my printer: the originals are not like that), and we just mark them with a happy face when she says the sound. She loves to see the happy faces start to add up. It's extremely convenient to be able to just grab the binder and have everything we need.


In addition to the page of letters with pictures (which are easier to read than the picture suggests, not bad in greyscale, and if you can print them in color they're super cute), there's also both capital and small letters that we'll be doing the same way until she has them cold.

After a couple days working with just letter sounds, I realized that the letters she needed to begin the first week of work on the -am word family (a, m, y, j, r, and d) are mostly letters she knows, so we started to work through that letter family, while still continuing to work pretty intensely with the individual letter sounds. This means that we're moving more slowly through these first lessons than one lesson a week, but I think that it's working out fine to do it this way, as far as how Peanut is doing with it.

This is the first page in the -am word family section. I had some extra page protectors, so we just tucked all of the pages in, which helps me adapt for the poor print quality because I can write out the words. Some of the pages are black and white; these rhyming pages are supposed to be really cute colored pages; my printer does all of them greyscale and that badly right now; the packet is supposed to be way cuter than what my pictures show. We sound them out together as I add each letter, and I give it a little circle when she's done it, because she likes me to.


There's a nice variety of activities, so even though we spend quite a while working on the same letter family, she isn't getting stale on the words. This means that she's happy doing enough practice to really get good at these words before we start adding in the next word family. And, the way that things are set up, it's easy to make sure that she's not just remembering and guessing, but actually reading the words. This word card activity was a huge favorite for us both. We set up a number of different sentences, but this one was one I knew Peanut's Grandpa would especially appreciate:


Review Pack READ


The review books are cute, and highly phonetic, which I really like. They're meant to coordinate with the curriculum, with a new set introduced every 5 lessons. The overview page has some color (see the screenshot to the left), but the books themselves are black and white, which is important for me right now. Really my only complaint is that it bothers me when phonetic words are introduced as sight words; in week 5, am one of the sight words -- but it fits one of the word families the kids should have learned! The only real sight word in week 5 is "the", and even that one can be taught phonetically if you pronounce it with a long e. Week 10's only sight words are "come" and "to" -- all the rest are phonetic. My feeling is that everything that can be taught phonetically should be, as that maximizes the child's ability to attack unfamiliar words. There are plenty of words that must simply be memorized; it doesn't make sense to me to add to that by including rule-following words in the sight words. That being said, these are lovely little books.

The setup for them books is pretty simple: you print them, cut them -- they're probably in the correct order as they come out of the printer -- and then staple them. Easy peasy. By this point we'd fixed up the printer, so I just went ahead and printed out the whole file. It's a good size stack, but I thought that would be easier to do than figuring out page numbers every time we need them. The instructions suggest using a kleenex box to store them, which I thought was really clever.


Assembly was as easy as promised: I cut them out with my paper cutter I got for scrapbooking, but you could easily do it with scissors, too. Then you lay them on top in order -- the books have page numbers, so it's easy, even if you get distracted while cutting them and lose your place. I cut and made up the four books that use the words from the first four lessons, and while Peanut hasn't quite gotten far enough to be ready for these yet, I'm really excited to use them. She must be, too, because she saw my pile of printed pages ready to turn into books, and spread them out all over (very carefully and tidy), and then asked if she could color them all! The books look excellent: simple, mostly really phonetic, and I'm excited to do them with her when she's ready. Once she's read them for the first time, then she can color them. She likes that kind of thing. 

Overall, I'm really liking this program, in fact I'm feeling very blessed to be on this review, since this is working so well for my daughter. They activities are holding her attention, there's plenty of practice, and the readers are cute. It's a good fit for us, and I plan to continue to use this after the review is done, instead of the other materials that I used with the boys.

UPDATE: Six months later, we're still very happy with this program, and she's made it to the first set of Review Pack books, which are adorable.

If you want to read more reviews of a number of different The Crafty Classroom products click the banner below.

http://schoolhousereviewcrew.com/adventures-of-rush-revere-book-series-reviews/


Crew Disclaimer

19 July 2017

Natural History Artists and Techniques


We've had such a lovely time learning from John Muir Laws that when that Natural History Illustration course asked people to share their local naturalist-artists that I thought I'd make a list, so that I can browse through them at my leisure. I'm hoping that some of them will also have teaching materials to look through, like he does. But just browsing their art would be fun, too.

Otto Wilhelm Thomé (1840-1925) - Cologne, Germany
Illustrations of the Zoology of South Africa
Jeannette Fournier - New Hampshire artist
Kathleen Marie Garness - Chicago Orchid artist
Jan Prentice - Connecticut
William D. Berry - from California, but did sketches in Alaska
Hye Woo Shin - from South Korea; I like her tree drawings
Lary Zach - Wildlife artist from Iowa
Angela Vaculik - artist from Ontario, Candad

Another resource recommended by the course is this set of measuring techniques. I've looked at one, and though I haven't had a chance to do any of the things they suggest, it looks like a good and useful exercise.


I love this quote that they included from DaVinci:


"Perspective is to painting what the bridle is to the horse, the rudder to a ship . . . There are three aspects to perspective. The first has to do with how the size of objects seems to diminish according to distance; the second, the manner in which colors change the farther away they are from the eye; the third defines how objects ought to be finished less carefully the farther away they are."
-Leonardo da Vinci


My first attempt at doing the homework for this course was a bird. Should have been a landscape... oops. But it's the best drawing I've done to date, so I'm still feeling pretty successful. I'm hoping to do some more with this, and to collect some more of the instructions to continue to work on after the course is finished, so that I can continue to improve. It's pretty exciting to see my work improving as much as it is.


18 July 2017

Mapelle Films: Trust Fund {Crew Review}


Trust Fund Movie

It's a bit of a change of pace to review a movie, rather than books or curricula! But Trust Fund has a fun homeschool connection: the cinematographer and producer, Isaac Alongi, was one of the early homeschoolers: he and his parents started homeschooling in 1982. He's now the talent behind Mapelle Films. So we watched Trust Fund.

It's a prodigal son - or in this case, prodigal daughter - story, and the framework of this beautiful parable (see Luke 15) is the anchor for the whole story. Reese, the younger, free spirited daughter of a successful publisher is feeling confined by her life, and the need to pay attention to basic mundane things... like having money in her account to pay her bills. Like paying her own rent or working. She's writing a book, and that should be enough "adulting" to cover everything. She doesn't get along very well with Audrey, the older sister, the perfect one who does everything "right".

Like so many girls from good families, Reese has "bad boy syndrome": the man she falls for is bad news: he's a member of an Italian crime family. Reese steals from the trust her late mother had set up for the girls and runs away to Italy, little realizing just how much trouble she's getting herself into. She comes within a hair's breath of ruining her life, but, fortunately for her, she's the heroine in a movie, and the parable has a happy ending! It's a fun chick flick: my husband was completely uninterested, and my oldest son was pretty ho-hum about it. I should have planned things better and had a girlfriend over to watch with me, but I didn't think of it in time. Even if my guys were unimpressed, I thought it was fun!


There's some cool things about this movie. The story, even though you know the basic outline because it's based on the parable, still keeps you guessing, and there's a couple of twists that I didn't see coming. And the pacing was different in a fun way: When, as an adult, I got my own copy of Disney's Cinderella, I was really surprised at how the style of the older movie is different from more recent ones: there's lots less changing of the camera angle, and there's more space in the movie to just enjoy, or to reflect. Trust Fund reminded me of that, just a little bit: the pace isn't as frantic as some of the newer movies. Maybe it's because we watch so much of action shows (the comic movies are big winners at our house), but this was a really nice change of pace. As far as the content, although she's run away with a boyfriend, and when she comes home there's another love interest, the movie is refreshingly free of bedroom scenes or anything of the sort. The only possible complaint as far as "too much skin" is that all the young women in the movie wear these (really cute) very short skirts... and that's it. That's the only content "advisory" that a parent might need to be aware of... and it's nothing! (I probably wouldn't even have noticed, if it wasn't for the fact that I strongly dislike wearing short skirts myself, so I kept thinking, "cute, but probably uncomfortable".) A movie with no content advisories whatsoever is a lovely change of pace! I also like the way that they follow the parable in that, when Reese comes home, the movie is only half done. The second half of the movie follows Audrey much more closely, and looks at her struggles to cope with Reese's decisions and her dad's responses... and the love interest that threatens to "replace" their mother in his heart. The father really is an amazing person. I had never before realized how super-human a parent would need to be, in order to respond the way that parable outlines. It's an interesting thing to ponder, as a parent. I'd never thought about the Prodigal Son as a lesson book on parenting... I see that passage a little differently now.

Mapelle Films also has an interesting study guide to go with the movie. Honestly, I was more than a little skeptical about it: it's a movie... what're you supposed to "study"? But the study guide was thought-provoking. It's written from a Protestant point of view, and the study guide to me suggests it's been written from a "total depravity" understanding of human nature. Total depravity, which goes hand in hand with the idea of original sin, is a Protestant doctrine which holds that we are, fundamentally, wholly corrupt, unable to even attempt to follow Christ because of what they refer to as our "sin nature". LDS theology holds that we are responsible for only our own sins and not for Adam's transgression, and that while we exist in a fallen world, we are, fundamentally, the children of God (Romans 8:16), and made in His image (Genesis 1:26-27), and being made in His image means that we are, at the core and in spite of the fall, fundamentally good and able to attempt to keep the commandments of our own will, though our imperfections in doing so mean that we must unavoidably rely upon the Savior's Grace. Still, even with these significant differences in theology, there was a lot in the study guide that was really thought provoking and beneficial to ponder. The makers of this movie have given long and careful thought to the parable that it's built upon, and they have a lot of insight to offer. These theological differences between Christian denominations in no way affect the movie; they only become apparent in reading the study guide.

There's also a companion volume -- you actually see it in the movie, which is kind of fun -- Love Was Near. It's recommended for girls age 12 and over, and since Peanut isn't even close, we didn't ask for that, but a number of the other reviews did, so if you're interested in the book or seeing other reviews, click the banner below:

http://schoolhousereviewcrew.com/adventures-of-rush-revere-book-series-reviews/


Crew Disclaimer

Doctor Aviation {Crew Review}

Doctor Aviation


My kids, particularly Hero(10), who loves all things airplanes, were really excited when I told them we would have the opportunity to learn about aviation history while we review Doctor Aviation. It's a six-month aviation course that consists of 15 video lessons, each with an accompanying PDF with all kinds of extras: readings from a variety of books and magazines, YouTube videos, links to virtual tours, and suggestions for relevant places to visit if you happen to be local, as well as activities to do. We are doing it as an enrichment course, but there's enough here that you could easily do it for a high school full credit course, or as a continuing education project for adults. It's really flexible, though, and I've been able adapt and springboard off of the suggested activities for my younger kids as well, even though they are not at all the intended audience. I find the videos to be informative, with plenty for me to learn -- and they hold the attention of both Hero(10) and Dragon(7).

When you log in there's a nice dashboard that shows your current lesson and your progress through the course. It's easy to navigate; the video is at the top, with a list of right under it, and the PDF resources below that.


The lessons are all structured so that, first you learn about "Technical Trivia", where he explains the parts and pieces of aircraft, and how they work, then he covers "Notable Innovators" where he talks about major contributors to the field of aviation, and finally "Legendary Aircraft" where he covers particular airplanes. The videos are each about an hour long, and Dr. Aviation himself is easy to listen to and informative. He alternates between lecturing next to a small aircraft, and showing pictures of the planes and people that he's teaching about.

As soon as we started doing the course, a couple of things started happening in our family. One is that a large percent of the many Lego creations that my boys turned out since we started the review are airplanes. As they'd learn about things, this would be incorporated into increasingly realistic replicas, limited more by the pieces available than anything else: the kids clearly understand what they're doing well enough that it could have been better if they'd had the parts. The other lovely result is the boys, in addition to devouring the materials from the course, would look at all kinds of additional aviation documentaries on YouTube in their free time. I love it when learning inspires enough enthusiasm that the kids seek out more on their own! There has definitely been a lot of self-directed learning that has expanded and explored on these topics.


In addition to the videos, the PDFs for each lesson also always includes recommended books for further reading. This was one area where the course really shines. While my boys love airplanes, and want to know all about how they work, I've always been content that they do work. But the books recommended include several biographies, of notable aviators, and I love those. So this course has a fair amount to offer, even if you're not really into airplanes, because the people around airplanes are really interesting people, and the books I've read have been very interesting. Hero is a strong reader, so in addition to watching the videos, I've had him choose several books from the suggestions to read. Hero and I didn't always read the same ones, but he's also been very happy with the titles he chose. Keeping the videos at the pace of his reading has slowed things to somewhat less than the intended schedule, so we will probably not do the readings for all the units in order to see all the videos before our subscription runs out, but it's been very beneficial to him to do the readings that he has done. Although our library has occasionally not had the exact titles recommended, we've been able to find ones by the same author, or on topics that we would not have explored if we hadn't had the book list to help me know what to look for. Finding Dragon a few age appropriate titles on the same topics has also been easy, even though these are not included in the materials.

In addition to additional reading material, the PDFs also include activities that you can do. One of the ones that I would like to do with the kids, but haven't yet, is to chalk out the outline of the Wright Flyer on the ground in order to get an appreciation of the scale the Flyer was built on. It's too large to draw on our driveway, and I haven't made it up to the church to borrow the parking lot, but I think that's a really cool way to bring home the scale of the thing. There are also additional resources for finding videos, websites, and virtual tours related to the lesson topics. For the high school or adult learner, you could really go quite in-depth with the materials provided.

Feeling, as I do, that education ought to be thoroughly Christian, there are a number of things I appreciate about this course. Dr. Aviation does not shy away from mentioning God and His involvement in history. Perhaps it is because I grew up with education and faith so strictly compartmentalized by the strong anti-religion taboos in public schools, but I always appreciate it when He is acknowledged as naturally as occasionally is the case in these videos. After reading the recommended McCullough biography on the Wright Brothers, I was as much or more impressed by their character as I was by their genius, and have added that one to my wish list as one I would like to add to our home library. The videos have also emphasized the positive character of other aviators. It's nice that my kids can learn about aviation, but I love that the course is holding up such great role models for my kids; character is the true aim of education.

This course has been great for us. It's extremely adaptable to meet the needs of a wide range of ages, and my kids hang on every word.


If you want to read more reviews of the Doctor Aviation program -some Crew members used as a high school credit- click the banner below.

http://schoolhousereviewcrew.com/adventures-of-rush-revere-book-series-reviews/


Crew Disclaimer

10 July 2017

Make-a-State {Crew Review}


Home School in the Woods has several Activity Packs, as well as the Project Passport that we reviewed previously, and many other offerings, but this time we've been given the Make-a-State Activity to review which was perfect timing for us: I had planned to do some work with Hero this year for Wisconsin state history. In addition to having Hero(10) do this lapbook, I also am doing it with Dragon(6), and even Peanut(4) is enjoying the coloring, cutting, and gluing -- because she is Big, like her brothers; ask her and see. Happily, while they are learning about our State, she is getting some nice practice in on her fine motor skills. It's a win all around. 

One cool thing about this packet is that it's very simple. Once we set it up, we just added a little bit to it a couple of times a week. There are 20 projects in all, plus instructions for assembling them into a very nice lapbook, but while that sounds huge, it doesn't feel huge, working on it. The kit that you receive from Homeschool in the Woods had materials for doing all 50 States, which is nice. When I was a kid, our family moved around, but I considered Utah to be our home. We had just moved to Wisconsin, and so when my 4th grade teacher announced that we were going to be learning about our "home state" I raised my hand and asked, "So, will I be learning about Utah? Because Wisconsin is not my home state." That was one of several times when that teacher did NOT smile at me; I had a difficult year that year. But if your family has similarly strong ties to several States, it would be a simple thing to use this Activity-Pak to learn about whichever States your interest draws you to, and at no extra cost for the additional States. In fact, because we do have a lot of family and church history that takes place in Utah, I'm considering asking the kids if they are interested in doing a second lapbook for Utah, when we have finished Wisconsin. There are several other States that our family has ties to that would be candidates for that kind of activity at some point, either in doing the whole project again, or in doing selected booklets.

 It's really easy to adapt to the various levels the kids are ready for: Peanut is primarily cutting and coloring, which is great for her fine motor skills and her need to be included when we do school. Dragon is getting his first exposure to some of the State trivia (our bird is a Robin, and our flower is a Wood Violet), and Hero is getting all that, plus he's getting practice at searching for information that he needs for this kind project: I'm having him do his own googling for most of the things, and helping him to figure out how to extract information from his search results: What are the biggest cities in the State? What was the population at the last census? Part of what I intend for him to gain from the activity is an increased ability to find this kind of information. Make-a-State's adaptivity is one of my favorite features about it.

Activity 7, the wildlife and plants of Wisconsin booklet (pictured left), is supposed to be printed front to back. My printer doesn't do that very well, and the instructions for how to do it are somewhat lacking on how the alignment ought to be, so putting that particular book together was something of a headache. We ended up printing two pages and gluing them back to front, and then assembling the booklet from there, rather than printing it doublesided. That being said, that booklet ended up being one of my favorites as the kids filled it out. I had the boys select and draw plants and animals from Wisconsin, and it was fun to see them draw on the things they have learned from our time doing nature study to fill this out. So far, this has been the only booklet that gave us trouble in assembly, and I've worked on 13 of the 20 included projects. All the rest of the instructions have been clear and easy to follow, and even the four year old can do a large amount of the cutting and assembly successfully.

Putting our own rivers on the State is challenging; I'm glad we don't have very many major rivers, and no mountains to try to depict! We ended up with some geographically suspect city placement, even with coaching on how to go about locating cities relative to several points on the border, but I feel like it was a good exercise anyway, and that even with some inaccuracy there's been good learning that went on here. It's also showed me that in our art instruction we need to talk about how to measure and look at some tricks to help my oldest be more aware of proportion. This is good information, and I really handn't suspected it before, so I'm glad that this project is set up the way that it is.


Lapbooks are, by nature, fiddly fussy projects. We don't do a lot of them for exactly that reason. I found that this worked better when we did a section once or twice a week, rather than when I tried to do several in a day. There's a lot of time spent in cutting and gluing. We used some of that time listening to an audio drama, and some of it listening to native drums, but by the middle of the lapbook, it still was feeling like a whole lot of cutting and pasting. However. I think that we did a better job of learning about our State than we would otherwise have done without this project. It really gave a lot of form and structure to "learn about Wisconsin", and they made it easy to know what things to look up. I've lived here most of my life, but in the process of filling out the little books with the kids I learned new things, too. I don't do a lot of lapbooks because they're a lot of fuss and a certain amount of busywork, but it really is a nice format for this kind of study. We need to learn about Wisconsin, and there's a lot of little disconnected bits of trivia that it's nice to know -- which seems less trivial when they're all connected in the lapbook. And the books are really cute as well as they come together. Homeschool in the Woods has even recently started offering À La Cart Projects, so that you can include just what interests you.

If you want to read more reviews of this and other Home School in the Woods' hands-on history products, click the banner below. There's other State lapbooks that are being shown, as well as a variety of American History packages, Old and New Testament materials, helps for composer and artist studies, and some really beautiful timelines that Crew members have been looking at so they can share their thoughts with you.
Click to read Crew Reviews


Crew Disclaimer

LinkWithin

Blog Widget by LinkWithin