
 For this review, we were given the Rigid Wrap and CelluClay Quik-Sculpting Kit, which is made by ACTÍVA Products. There is also a ACTÍVA Products' Favorite Sculpture KIDS CRAFTS, which is a free ebook designed to go with the kit, downloaded from their website.
This is a first for us; we've never used Rigid Wrap or anything like it. It turns out that there's a lot of tutorials on YouTube and Pinterest, if you search for things like "Rigid Wrap" and "plaster cloth", which was really helpful to me. There are also instructions in the ebook, but it was in seeing other people actually using the materials that I started to understand what the materials are like and get an idea of how to use them. The ebook includes a number of craft projects, but I wanted to make something that would line up more with the history that we've been doing, which is focused on the time period around William the Conqueror right now. I decided that we would make a replica of the crown he wears in one of the portraits that I found of him.

 |
| Image Credit |
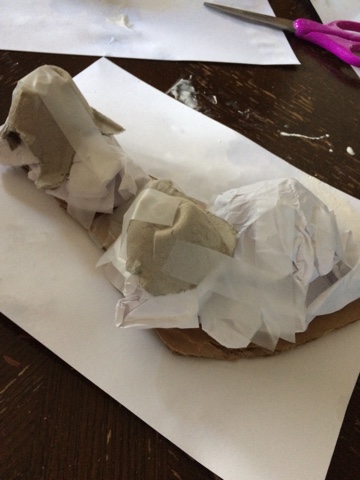 The kit is really generous, so after we'd started the crown, we tried making a rock, like what the people who do model railroads and war games with miniatures make, while we waited for the crown to dry. The enthusiasm for this rather gooey activity was in no way spent, so we went ahead and got started the second project right away. We don't do a lot of playing tabletop war games, but the Daddy and I have enjoyed painting minis for years, and some of the scenery pieces that people were making in the tutorials I found for these materials are really cool, so I wanted to try making a rock. The base starts out with just paper and things that we found in the recycle bin, which looks amazingly credible as a rock shape already after we'd covered it with strips of Rigid Wrap. We set both of them outside to dry, hoping that the wind would hurry things along for us, because nobody really wanted to wait long for the next phase of the activity! The cool thing is, even with two projects in progress, we haven't even used up a whole roll of the plaster cloth.
At this point, I turned my attention to the CelluClay that's included in the kit. Unfortunately, the instructions in the kit don't have anything to say about this, which, although the box says it's a bonus, is half of the contents of the kit. This is frustrating: if you're going to include a "bonus" product (which is no doubt worked into the price), then there should be instructions on how to use it. After a little digging in the links they gave us for the review, I found a winged hearts project on the website that includes instructions for how to use the CelluClay. If I had bought this at the store, this would have been more than a little irritating to need to go searching for instructions: the included projects just say "mix CelluClay in a ziplock baggie", which isn't very helpful. And it really needs instructions: you mix the stuff you get in the box with water and mold it into the shape you want. This is totally different from any other clay we've tried previously. However, it's really easy, just a 2:1 clay powder to water mixture mixed up with your fingers, and it's pretty easy to manipulate the wetness a little, depending on what you're trying to do: more water will smooth out really pretty nicely (though not perfectly smooth), and less water holds its shape a little more firmly. The winged hearts project even has a video that you can click through to, so you can see what it's supposed to look like, which was really nice.
 We coated both the crown and the rock with CelluClay, trying to smooth out the crown as much as possible, and using it to create texture on our rock, as well as fill in some of the gaps we still had between sections, and smoothing away the grid-texture from the Rigid Wrap, which didn't fit the rock idea at all. The kids had a great time with this part. Peanut and Dragon handled the crown and Hero did the rock. I mostly just kept the younger kids from getting the clay too thin with the water we were dipping our fingers in to do the smoothing.
In addition, I found that you can also play around with it as it dries, and continue to nudge it into the shape you want as it starts to harden, which is a great feature. I did that with our rock, smoothing out some of the spikes the kids had left, after it was drying and no longer the center of their attention. After we put the CelluClay on, we needed to let it sit probably close to 12 hours before it was completely dry. This project was one that we worked on several times over a couple of days. It doesn't take long at all to put things together at any of the stages in building it, but there's a lot of drying time in between, so plan to do this with several days to work and wait and work again.
 For the crown's little decorative ridge, I used another layer of CelluClay, and for the spikes that come out of the ridge, I built six little triangles with circles on top that on a piece of cardstock, just drawn out freehand, then tucked into the wet CelluClay.
 I think that, if I was doing it again, I'd use very thin cardboard, and coat them with one or the other of the materials, which would toughen them up and give them a texture similar to the rest of the crown, but this time I just went with putting the cardstock spikes on the crown, set into the CelluClay. This idea didn't end up working very well, as they didn't stick to the crown the way that I'd hoped. But it's good enough to be fun to play with once it's finished.
 Then it was more drying overnight. But I did spray paint the rock project black as the first step in getting the white lump to start looking more like a rock! We left the crown white as the base color, since you tend to get brighter colors that way, and Hero wanted to paint it red. I evened up the bottom with the scissors before I turned it over to them. A tougher tool would probably have been better, but I didn't have anything that seemed likely ready to hand, and the scissors did get the job done. I did point out that crowns are typically made of gold, but Hero said he was going to start with red. He and Peanut painted it, and I went behind and filled in some of the white spots for them: the texture meant that Peanut, especially, had a hard time getting into all the dips and valleys with the paint. Which is just fine for the crown, and absolutely perfect for the rock.
Pretty soon, our own royalty were sporting crowns. We got out some of the dress-ups and costumes (Do you like the LOTR tunic that I made Hero a while back?), and messed around for a while.

The crown itself is surprisingly sturdy, and will probably last a while even in dress-up play, which is pretty cool. We didn't put too many layers on, probably 2-3 in most places, though the top has a little more where I was trying to smooth away the print from the foot of the cereal bowl we used to make it, and I had been a little worried it would be flimsy, but it's not at all. It's a little on the small side, so if you do this probably pick a bowl that fits the kids' heads a little better than ours did; I didn't think to size it before we started.

The rock turned out beautiful. It even fooled Dragon into thinking that I had a real rock at one point -- and he helped make it, silly kid! I finished painting it, and then glued some of the flocking we have to do bases of our minis to make it look mossy and dirty... like a rock should. I'm really pleased with how it turned out. The projects in the ebook are cute, but they're really very young, and one of the things I wanted to know as if the Rigid Wrap and CelluClay could be used for projects that teens or grownups might want to do -- can they be real art, as well as crafts. And the answer is a resounding yes. I saw another Crew member talking about doing a relief map for part of their geography work, which is a great idea, especially if you're going to be working on a certain area over a period of time. I think it could absolutely be used for that and for all kinds of other projects, ranging from the youngest kids' crafts to serious art projects. I love the versatility of this product.

At the end of these fun projects my thought is that the products are very good, and there's a whole lot of different things you can make with them -- once you figure out how to use them. The instructions are lacking for both how to use them, and how to clean up: I ended up with plaster stuck to the bottom of my bowl when I didn't wash it out right away. Probably should have seen that coming... but I didn't, and a little note in the instructions would have been really nice. However, both Rigid Wrap and CelluClay are easy to use and the kit is generous enough to do a number of projects, so once you have learned what to do, the possibilities for what to build are near endless. Clean up is easy -- but don't dump it down the sink! I was looking at one of the other reviews, and plaster in the pipes caused some minor problems for one of the other Homeschool Review Crew families. But the lack of instructions are really the only downside. Clean up, as long as you do it immediately, is a snap: everything just wipes away, and any plastery water gets dumped in the yard. The cardstock pages we used to protect our surfaces were completely adequate to the job. You could use tinfoil or maybe parchment or wax paper if you didn't want it to stick to your base, but we just ripped the cardstock off and it was no big deal for what we made. Both the Rigid Wrap and CelluClay are easy to use, and I can definitely see us using these supplies again at some point. Plus, even after doing these two projects, there is about half the contents of the box left: I love it when good supplies stretch for several projects.

If you want to read more reviews of the Activa Products or look at all the clever projects other Crew members made, please click the banner below.


3 comments:
Fun! Yay for new dress-up duds and the rock looks cool!
Amazing! The crowns look like they turned out really well. And it's cool that the kids enjoyed it so much!
It *was* a fun craft -- though there's just one crown being passed around between all the kids. We ended up with a bit of a time crunch to get these done, and there's *no way* we could have made three in the time we had! But I'm really happy with them. :)
Post a Comment